

Before you begin please take the time to read the article on pipline architecture. CI/CD pipeline with Cloud Build and Cloud Run. *Development & production environment with Cloud Build and Cloud Run.
Here we will see how to configure this architecture in a development and production environment.
- Configuration of services on GCP
Create two GCP projects. One project for the development environment and another for the production environment. The configuration will be the same for both environments simply because we will focus only on the configurations needed for deployment on Cloud Run.
Activate the APIs of the Cloud Build, Artifact Registry and Cloud Run services.
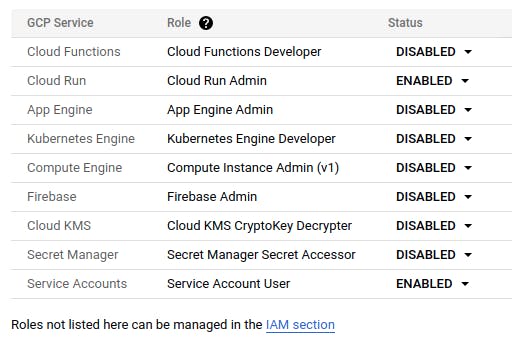
Go to the Cloud Build settings and assign the Cloud Run Admin and Service Account User roles to Cloud Build.
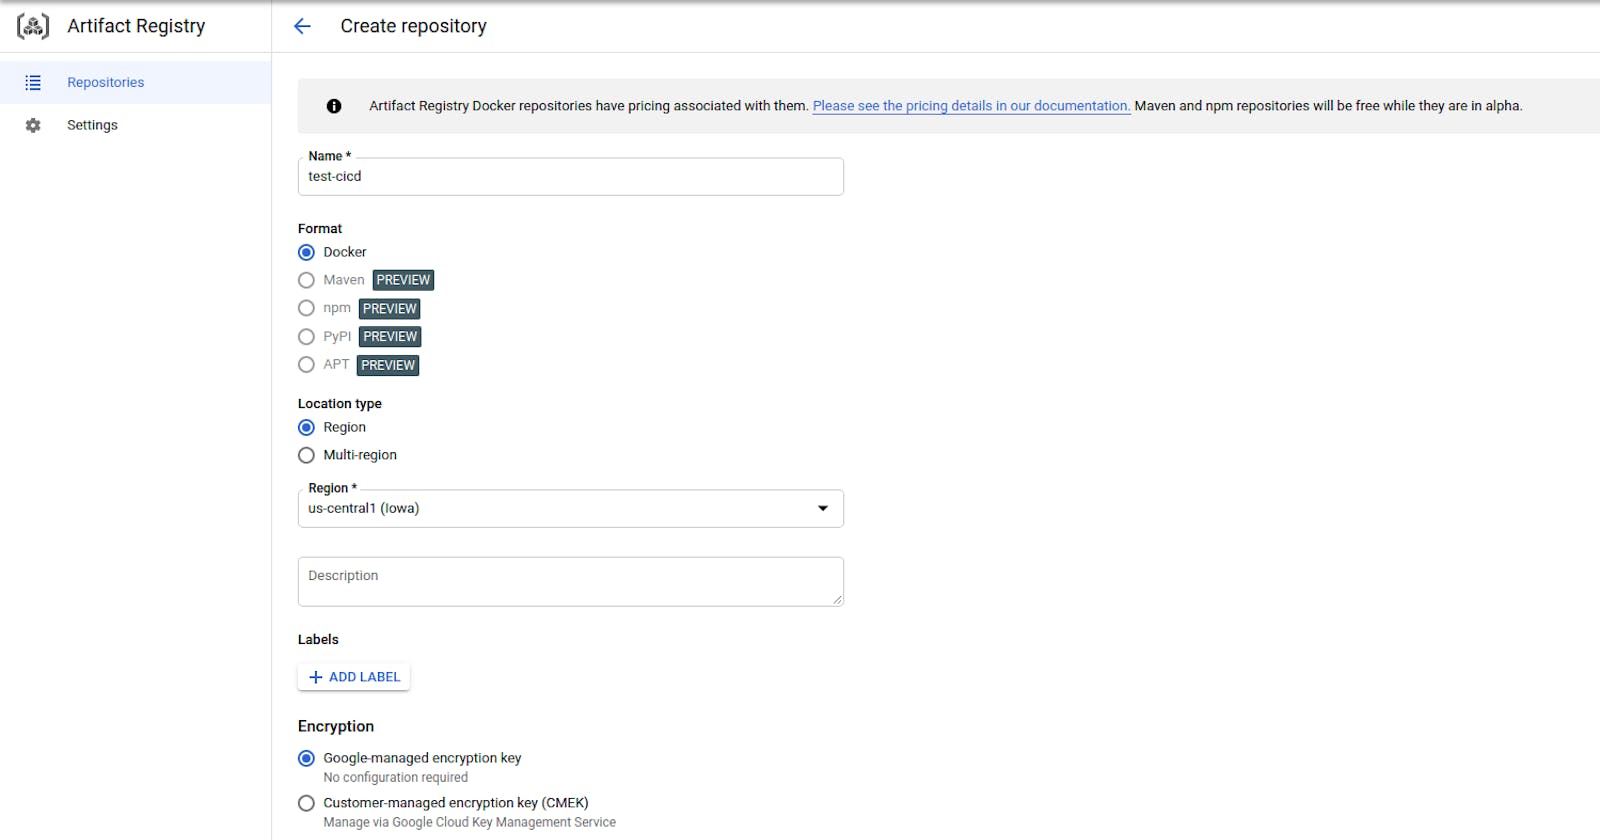
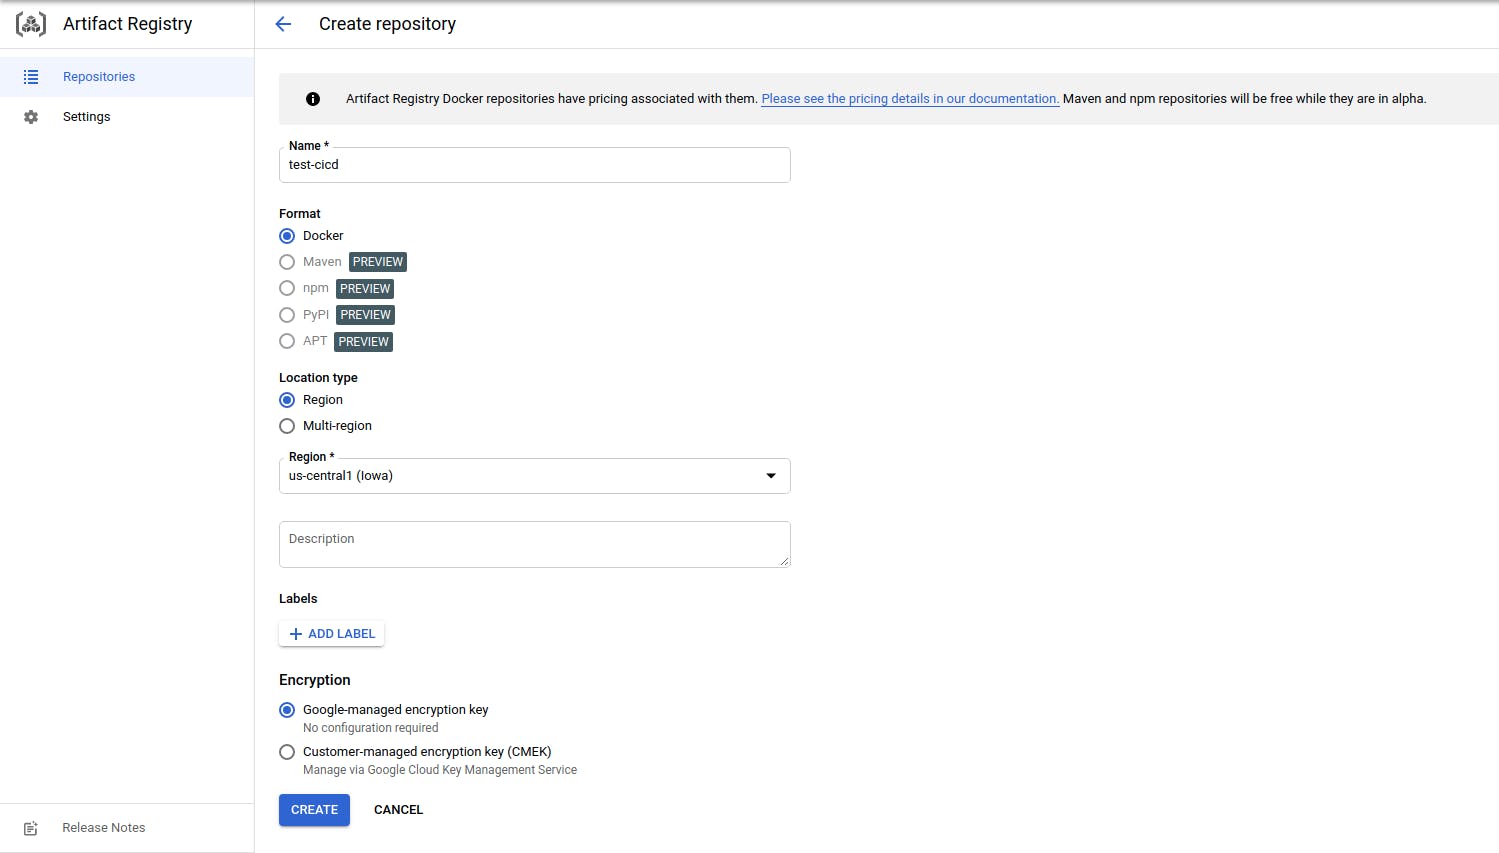
- Create a Docker repository in Artifact Registry.
- Create a service account with the Cloud Build Service Account role and Project > Viewer.

- Then generate a new key pair and upload it.
Don’t forget to repeat the same configurations for both environments.
- CI/CD environment variable on Gitlab
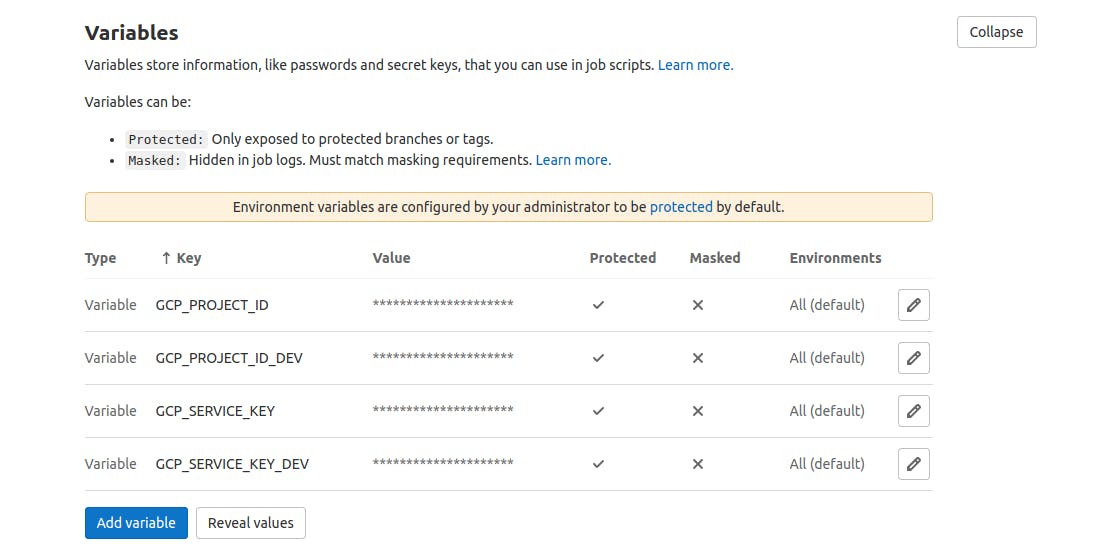
Click on Settings > CI/CD > Variables > Expand
Then, add the following variables:
GCP_PROJECT_ID : project ID of the production environment.
GCP_PROJECT_ID_DEV : project ID of the development environment.
GCP_SERVICE_KEY : the content of the json file of the service account key pair created in the production environment.
GCP_SERVICE_KEY_DEV : the content of the json file of the service account key pair created in the development environment.
- .gitlab-ci.yaml Configuration
Let’s analyze the .gitlab-ci.yml file step by step.
# File: .gitlab-ci.yml
stages:
  - build
  - test
  - deploy-dev
  - deploy-prod

default:
  image: docker:latest
  services:
    - docker:dind
  before_script:
    - docker login -u "$CI_REGISTRY_USER" -p "$CI_REGISTRY_PASSWORD" $CI_REGISTRY

docker-build:
  # Use the official docker image.
  stage: build
  only:
    refs:
      - master
      - develop
  # Default branch leaves tag empty (= latest tag)
  # All other branches are tagged with the escaped branch name (commit ref slug)
  script:
    - |
      if [[ "$CI_COMMIT_BRANCH" == "$CI_DEFAULT_BRANCH" ]]; then
        tag=""
        echo "Running on default branch '$CI_DEFAULT_BRANCH': tag = 'latest'"
      else
        tag=":$CI_COMMIT_REF_SLUG"
        echo "Running on branch '$CI_COMMIT_BRANCH': tag = $tag"
      fi
    - docker build --pull -t "$CI_REGISTRY_IMAGE${tag}" .
    - docker push "$CI_REGISTRY_IMAGE${tag}"
  # Run this job in a branch where a Dockerfile exists
  interruptible: true
  environment:
    name: build/$CI_COMMIT_REF_NAME


test:
  # Use the official docker image.
  stage: test
  only:
    refs:
      - master
      - develop

  script:
    - docker run -p 3000:8080 --name my-app -d "$CI_REGISTRY_IMAGE${tag}"
    - apk --no-cache add curl
    - chmod u+x ./test.sh && ./test.sh
    #- docker inspect --format='{{range $p, $conf := .NetworkSettings.Ports}} {{$p}} -> {{(index $conf 0).HostPort}} {{end}}' $(docker ps -aq)
    #- docker port my-app
  after_script:
    - docker stop my-app && docker rm my-app

  environment:
    name: test/$CI_COMMIT_REF_NAME
  when: on_success


deploy-dev:
  stage: deploy-dev
  only:
    refs:
      - develop
  image: google/cloud-sdk
  services:
    - docker:dind
  script:
    - echo $GCP_SERVICE_KEY_DEV > gcloud-service-key-dev.json # Google Cloud service accounts
    - gcloud auth activate-service-account --key-file gcloud-service-key-dev.json
    - gcloud config set project $GCP_PROJECT_ID_DEV
    - gcloud builds submit . --config=cloudbuild-dev.yaml
  environment:
    name: develop/$CI_COMMIT_REF_NAME
    action: stop

deploy-prod:
  stage: deploy-prod
  only:
    refs:
      - master
  image: google/cloud-sdk
  services:
    - docker:dind
  script:
    - echo $GCP_SERVICE_KEY > gcloud-service-key.json # Google Cloud service accounts
    - gcloud auth activate-service-account --key-file gcloud-service-key.json
    - gcloud config set project $GCP_PROJECT_ID
    - gcloud builds submit . --config=cloudbuild.yaml

  environment:
    name: production/$CI_COMMIT_REF_NAME
    action: stop
#!/bin/bash
#HTTP="$(docker inspect --format='{{(index (index .NetworkSettings.Ports "8080/tcp") 0).HostPort}}' $(docker ps -aq))"
HTTP=$(curl -I docker:3000 2> /dev/null | grep -c "200 OK")
DOCKER=$(docker ps | grep -c "$CI_REGISTRY_IMAGE${tag}")
if [  $DOCKER -eq 1 ]
then
    #if [ $HTTP = "8080" ]
    if [ $HTTP -eq 1 ]
    then
        echo Container running and visible on port 3000, good job!
    else
        echo The container is running, but the website is not published on port 3000
    fi
else
    echo No container running
fi
In the first step, we will build our docker image.
Once that’s done, we’ll run our docker image and check if our container is working properly. First, we will check if the container is running and secondly, we will check the port of the container. Depending on the needs of your project, you can add as many tests (Dependency-Scanning, Container-Scanning, Secret-Detection, etc.) as you want.
After the success of the previous steps, we will call our cloudbuild-dev.yaml file if we are on the develop branch for the deployment of our application. On the other hand, if we are on the master branch, we will use our cloudbuild-prod.yaml file.
You can also perform other rounds of tests with Cloud Build before deploying your application to Cloud Run. It will all depend on your goals.
# File: cloudbuild.yaml
steps:
    # build the container image
  - name: 'gcr.io/cloud-builders/docker'
    args: [ 'build', '-t', 'us-central1-docker.pkg.dev/$PROJECT_ID/docker-repository-name/image_name', '.' ]
    # push the container image
  - name: 'gcr.io/cloud-builders/docker'
    args: [ 'push', 'us-central1-docker.pkg.dev/$PROJECT_ID/docker-repository-name/image_name']
    # deploy to Cloud Run
  - name: "gcr.io/cloud-builders/gcloud"
    args: [ 'beta', 'run', 'deploy', 'service_name', '--image', 'us-central1-docker.pkg.dev/$PROJECT_ID/docker-repository-name/image_name', '--region', 'us-central1', '--tag', 'dev', '--platform', 'managed', '--port', '8080', '--allow-unauthenticated']
# File: cloudbuild.yaml
steps:
    # build the container image
  - name: 'gcr.io/cloud-builders/docker'
    args: [ 'build', '-t', 'us-central1-docker.pkg.dev/$PROJECT_ID/docker-repository-name/image_name', '.' ]
    # push the container image
  - name: 'gcr.io/cloud-builders/docker'
    args: [ 'push', 'us-central1-docker.pkg.dev/$PROJECT_ID/docker-repository-name/image_name']
    # deploy to Cloud Run
  - name: "gcr.io/cloud-builders/gcloud"
    args: [ 'beta', 'run', 'deploy', 'service_name', '--image', 'us-central1-docker.pkg.dev/$PROJECT_ID/docker-repository-name/image_name', '--region', 'us-central1', '--no-traffic', '--platform', 'managed', '--port', '8080', '--allow-unauthenticated']
As you can see, the deployment in the development environment receives 100% of the traffic while the production environment receives 0%. This is quite normal because it is continuous delivery. The scaling of the application in the production environment will be done manually.
NB : when you use the “ — no-traffic” setting for your first deployment, you will get an error message, because the first revision of your first deployment must receive 100% traffic.
Thank you for your attention.