

LAMP
In this article, we are going to set up a complete environment to host a website on Google Cloud Platform. Hosting a website amounts to setting up a web server, a database and software to facilitate deployment.
To go faster, we will use the LAMP solution which will understand all the software we need.
What is LAMP?
LAMP is a solution that allows you to quickly start building your websites and applications by providing a coding framework. It provides standalone project directories to store your applications.
There are several other solutions for hosting, but Bitnami’s is the most complete and the most successful.
This solution is configured for production environments. It includes automatic SSL configuration with Let’s Encrypt certificates and the latest versions of PHP, Apache and MySQL on Linux. This application also includes the frameworks phpMyAdmin, PHP, Zend, Symfony, CodeIgniter, CakePHP and Laravel. This open source solution.
Now that we have an idea of the tools we are going to use, we are going to connect to GCP to set up our hosting environment.
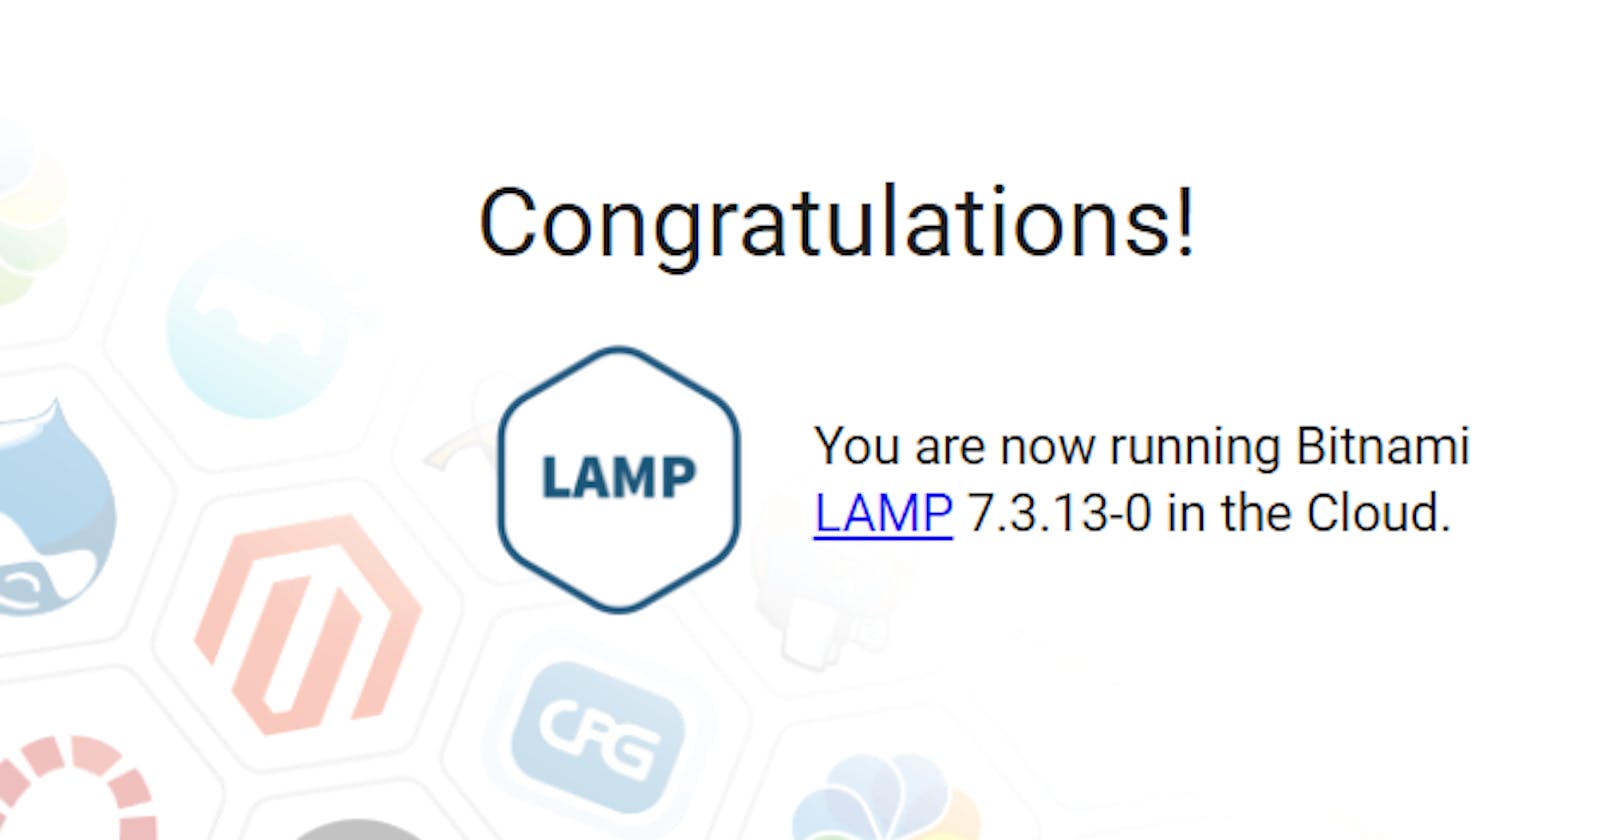
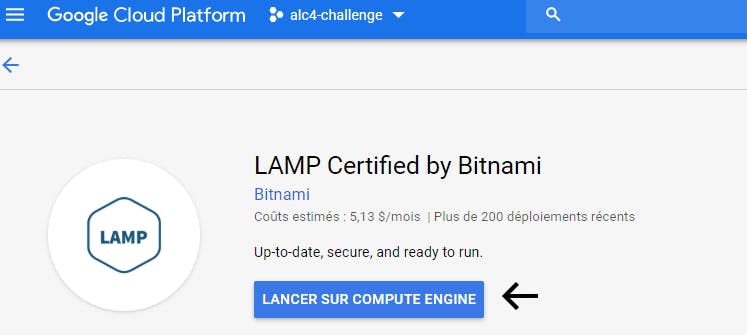
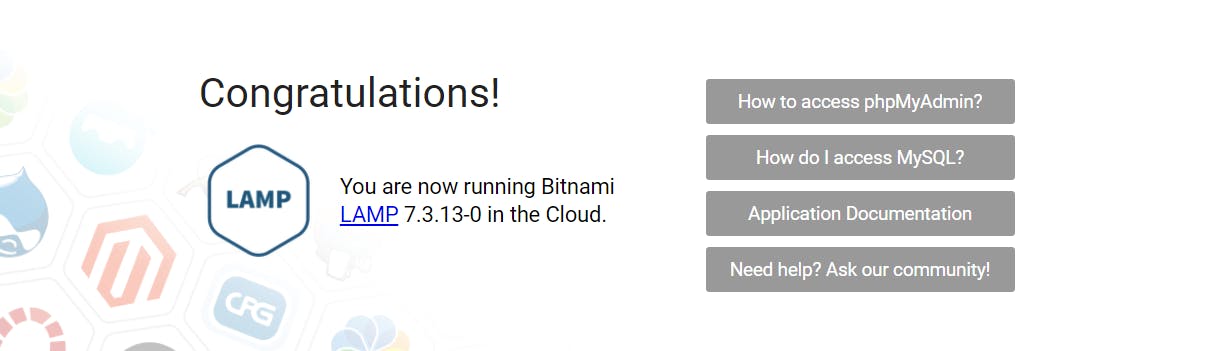
Deployment of LAMP certified by Bitnami on GCE.
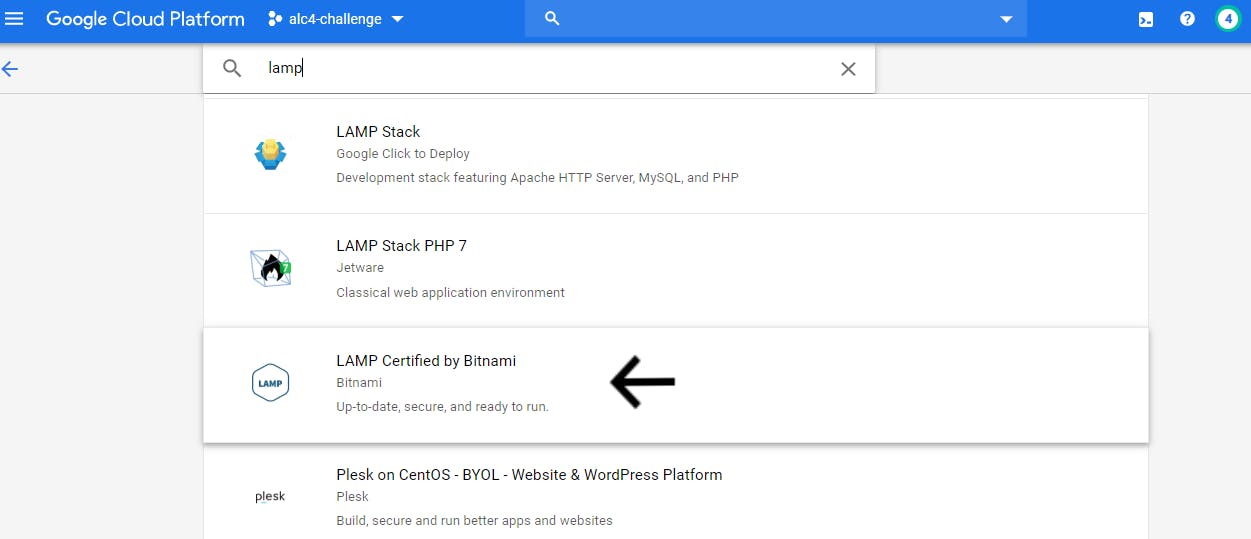
Log in to GCP and go to Marketplace.
 LAMP Bitnami
Once the machine has been created, we will connect and browse the LAMP files.
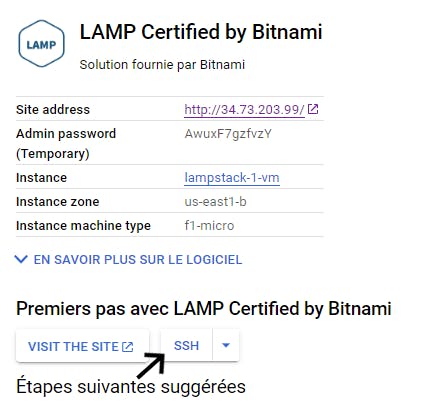
Click on “Site address” to launch to the website.
 LAMP Bitnami GCE
To access the VM that will host your website, click on “SSH”.
 Connection in ssh
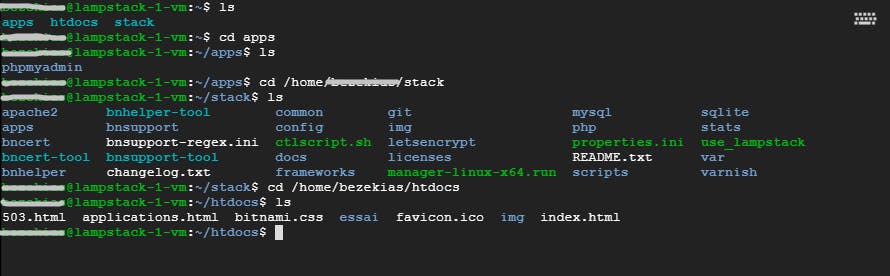
Once you are connected to the VM and type the following commands:
$ cd htdocs : to access the directory that will contain the files for your website. $ cd apps : to access the phpmyadmin folder. $ cd stack : to access the files of the installed software.
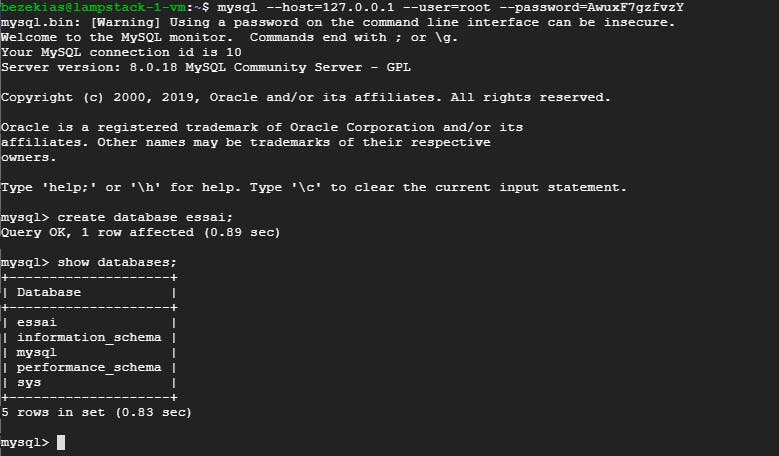
After that, we will connect to MySQL and create a database called “test”. For this, we will need “Admin password”.

It is with this password that we will access MySQL. Now let’s run this command : mysql --host=127.0.0.1 --user=root --password=“Admin password”.
Use the command “create database db_name;” to create your database.
Now we are going to create an index.php file in the “htdocs” folder which will allow us to connect our website to our database.
$ cd htdocs
$ sudo rm index.html
$ sudo nano index.php
<?php
$servername = "localhost";
$username = "root";
$password = "Admin password";

try {
    $conn = new PDO("mysql:host=$servername;dbname=essai", $username, $password);
    // set the PDO error mode to exception
    $conn->setAttribute(PDO::ATTR_ERRMODE, PDO::ERRMODE_EXCEPTION);
    echo "Connected successfully";
    }
catch(PDOException $e)
    {
    echo "Connection failed: " . $e->getMessage();
    }
?>
Access the website again with “Site address”.
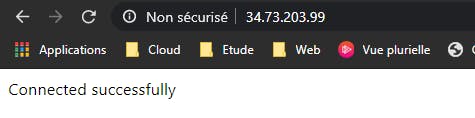
And here we are, our page is connect to the database. To upload files from your website to the VM, do this:
click on ⚙️ and 👇🏽.
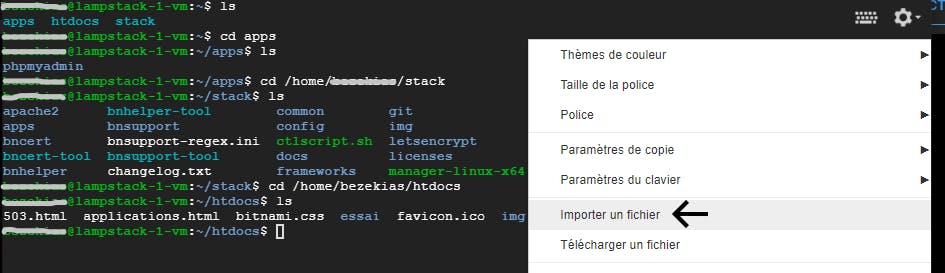 upload files
NB : compress your files before downloading them.
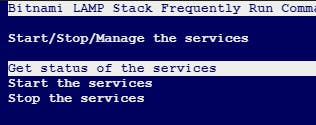
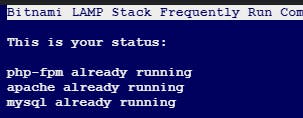
For the management of the different services, use this command to access the control panel 👇🏽.
sudo /opt/bitnami/bnhelper-tool
For more information on using “LAMP Certified by Bitnami”, access this page 👇🏽. Bitnami LAMP Stack for Google Cloud Platform Bitnami Documentation > Google Cloud Platform > Bitnami Infrastructure Stacks for Google Cloud Platform > Bitnami LAMP…docs.bitnami.com
In the next article, we will see how to install the SSL certification and configure the vhosts file so that the site is linked to a domain name.
Thanks for the reading.